SpringFrameworkでアノテーション(@Component、@Autowired)を使ってみる
今回は、@Component、@Autowired、@Serviceを使ってみます。作る手順は前回と同様ですが、設定ファイルの中身やソースを変えます。
まずは動かしてみましょう
pom.xml は前回と同様です。Spring用の設定ファイル(SpringTest.xml)を以下を追加します。
<beans xmlns="http://www.springframework.org/schema/beans"
	xmlns:xsi="http://www.w3.org/2001/XMLSchema-instance" xmlns:context="http://www.springframework.org/schema/context"
	xsi:schemaLocation="http://www.springframework.org/schema/beans
	http://www.springframework.org/schema/beans/spring-beans-4.2.xsd
	http://www.springframework.org/schema/context
	http://www.springframework.org/schema/context/spring-context-4.2.xsd">

	<bean id="helloWorld" class="spring.test.SpringBean">
		<property name="text" value="Hello World!!" />
	</bean>

	<context:component-scan base-package="spring.test" />
</beans>
component-scan要素は指定場所(パッケージ)のクラスファイルよりアノテーション(@Component、@Autowiredなど)を読み込みます。
読み込みたいパッケージが複数ある場合は、パッケージ数分、component-scan要素を記述します。このページの下の方の例で2つパッケージを読み込んでいます。
設定ファイルは以上です。次はJavaファイルを作成、修正します。
実行対象となるJavaクラス(HelloWorldTest.java)は修正なしです。
package spring.test;

import org.springframework.context.support.FileSystemXmlApplicationContext;

public class HelloWorldTest {
	public static void main(String[] args) {
		FileSystemXmlApplicationContext context = new FileSystemXmlApplicationContext("C:\\workspace\\springApp\\SpringTest.xml");
//		FileSystemXmlApplicationContext context = new FileSystemXmlApplicationContext("classpath:SpringTest.xml");

		SpringBean bean = (SpringBean) context.getBean("helloWorld");
		bean.show();

		context.close();
	}
}
次に設定ファイルよりSpringがデータをセットするBeanクラス(SpringBean.java)ですが、@Autowiredを付けたフィールドを追加します。
package spring.test;

import org.springframework.beans.factory.annotation.Autowired;

public class SpringBean {
	private String text;

	@Autowired
	private SpringComponent component;

	public void show() {
		System.out.println(text);
		component.show();
	}

	public String getText() {
		return text;
	}

	public void setText(String text) {
		this.text = text;
	}
}
最後に@Componentを持つクラス(SpringComponent.java)を作成します。
package spring.test;

import org.springframework.stereotype.Component;

@Component
public class SpringComponent {

	public void show() {
		System.out.println("Hello Component!");
	}
}
準備は以上で終わりです。それでは実行してみましょう。
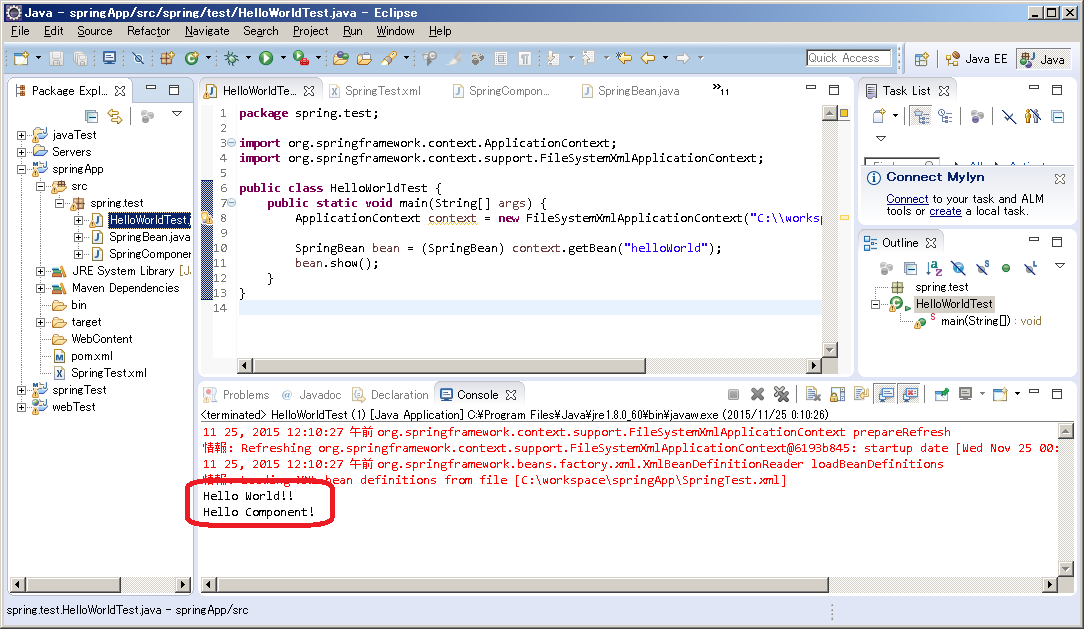
作成したファイルに問題がなければ、「Hello World!!」と「Hello Component!」と表示されます。
コンポーネント
前回は設定ファイルでオブジェクト作成を行いましたが、今回はアノテーションでオブジェクトの作成を行いました。component-scanで指定した場所に @Autowired が見つかった場合、@Componentが付いているクラスのオブジェクト(Springが自動的にオブジェクトを生成してくれます)を探し、@Autowiredのインスタンス変数にセットします。
@Componentは幾つか拡張版が用意されており、同じような動きをします。用途によって使い分けて下さい。
| @Component | 下の3つのアノテーションのベースとなるもの。 |
| @Repository | DBアクセス関連のクラスはこれにする。DBアクセス時の例外がDataAccessExceptionになる。 |
| @Service | 処理をひとまとめにするとき、トランザクションのコミット単位の処理などはこれにする。 |
| @Controller | SpringでWebアプリを作るときにMVCのコントローラはこれにする。 |
インターフェースの活用
今回の例も活用の仕方が分かり難いですが、Componentクラスをインターフェースにすると活用の仕方がわかります。SpringComponent.java(クラスからインターフェースに変更)
package spring.test;

public interface SpringComponent {

	public void show();
}
SpringComponentの実装クラスを用意します。
SpringComponentImpl1.java
package spring.test1;

import org.springframework.stereotype.Component;
import spring.test.SpringComponent;

@Component
public class SpringComponentImpl1 implements SpringComponent {

	public void show() {
		System.out.println("One");
	}
}
SpringComponentImpl2.java
package spring.test2;

import org.springframework.stereotype.Component;
import spring.test.SpringComponent;

@Component
public class SpringComponentImpl2 implements SpringComponent {

	public void show() {
		System.out.println("Two");
	}
}
上記のように実装クラスが複数存在した場合、どの実装クラスを使用するかは、Spring設定ファイルで決められます。
例えば以下の様に spring.test1 を指定した場合、SpringComponentImpl1が使用されます。
Spring用の設定ファイル(SpringTest.xml)
<beans xmlns="http://www.springframework.org/schema/beans"
	xmlns:xsi="http://www.w3.org/2001/XMLSchema-instance" xmlns:context="http://www.springframework.org/schema/context"
	xsi:schemaLocation="http://www.springframework.org/schema/beans
	http://www.springframework.org/schema/beans/spring-beans-4.2.xsd
	http://www.springframework.org/schema/context
	http://www.springframework.org/schema/context/spring-context-4.2.xsd">

	<bean id="helloWorld" class="spring.test.SpringBean">
		<property name="text" value="Hello World!!" />
	</bean>

	<context:component-scan base-package="spring.test" />
	<context:component-scan base-package="spring.test1" />
</beans>
実行結果
One
設定ファイルの spring.test1 を spring.test2 に変更すると SpringComponentImpl2 が実行されます。
実行結果
Two
このようにどの実装クラスを使用するにも呼び出し元である HelloWorldTestクラス を修正する必要がありせん。
アノテーションを使わない場合
アノテーションを使わない場合、以下のようにSpring用の設定ファイルでクラスを直接指定します。Spring用の設定ファイル(SpringTest.xml)
<beans xmlns="http://www.springframework.org/schema/beans"
	xmlns:xsi="http://www.w3.org/2001/XMLSchema-instance"
	xmlns:context="http://www.springframework.org/schema/context"
	xsi:schemaLocation="http://www.springframework.org/schema/beans
	http://www.springframework.org/schema/beans/spring-beans-4.2.xsd
	http://www.springframework.org/schema/context
	http://www.springframework.org/schema/context/spring-context-4.2.xsd">

	<bean id="springComponentImpl1"
		class="spring.test1.SpringComponentImpl1">
	</bean>

	<bean id="helloWorld" class="spring.test.SpringBean">
		<property name="text" value="Hello World!!" />
		<property name="component" ref="springComponentImpl1" />
	</bean>

</beans>
SpringComponentImpl1.java
package spring.test1;

import spring.test.SpringComponent;

public class SpringComponentImpl1 implements SpringComponent {

	public void show() {
		System.out.println("One");
	}
}
SpringBean.java
属性名を設定ファイルと合わせるのとsetterメソッドも用意する必要があります。
package spring.test;

public class SpringBean {
	private String text;

	private SpringComponent component;

	public void show() {
		System.out.println(text);
		component.show();
	}

	public void setComponent(SpringComponent component) {
		this.component = component;
	}

	public String getText() {
		return text;
	}

	public void setText(String text) {
		this.text = text;
	}
}
実行結果
One
ページのトップへ戻る